Moving your WordPress website to a new hosting provider can seem like a daunting task, filled with potential risks of data loss or extensive downtime. However, with a precise, step-by-step plan, a successful and smooth WordPress Host Transfer is entirely achievable.
This comprehensive guide will walk you through the entire WordPress Migration process, ensuring you maintain 100% data integrity, minimize downtime, and successfully Transfer WordPress to New Host seamlessly.
Why You Might Need to Transfer WordPress to New Host
There are several compelling reasons why site owners decide to move their established WordPress site:
- Performance Issues: Your current host might be slow, leading to poor user experience and damaging SEO rankings.
- Lack of Scalability: Your site has outgrown the current hosting plan (e.g., moving from Shared Hosting to a powerful VPS).
- Cost and Support: Finding a provider that offers better value, more features, or superior customer support.
- Security Concerns: Dissatisfaction with the current host’s security measures and proactive protection.
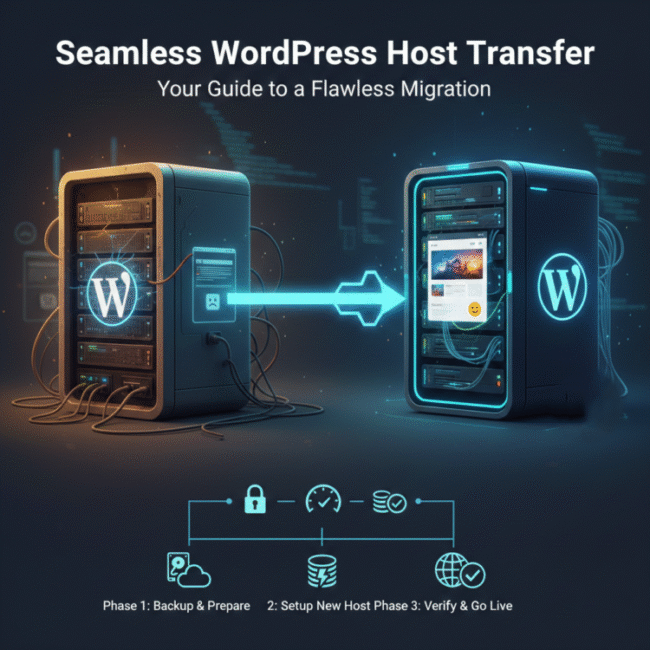
Phase 1: Preparation and Backup (The Critical First Step)
Before initiating the Transfer WordPress to New Host process, a complete and verified backup is non-negotiable. This is your safety net.
1. Install a Migration Plugin (Recommended Method)
The easiest and most modern approach is to use a dedicated migration plugin. These tools automate the most complex parts of the process, particularly database serialization (updating URLs).
Popular Options: All-in-One WP Migration, Duplicator, or Migrate Guru.
Procedure: Install the plugin on your old host and create a complete backup file of your entire site (files and database). Download this file to your local computer.
2. Manual Backup (For Advanced Users)
If you prefer a manual approach, you must handle two separate components:
File Transfer via FTP/SFTP
- Connect to your old host via an FTP client (like FileZilla).
- Download the entire contents of your public_html folder (or the directory where your WordPress is installed).
Database Export via phpMyAdmin
- Log into your old host’s control panel (cPanel/Plesk).
- Open phpMyAdmin and select your WordPress database.
- Click the “Export” tab and use the “Quick” export method to save a .sql file of your entire database.
Phase 2: Setting Up the New Environment
Once your backup is secured, you can begin preparing the new hosting environment.
1. Set Up Your Domain and Temporary URL
When you sign up with your new host, ensure the main domain name for your WordPress site is correctly configured. Most quality hosts will provide you with a temporary URL or an IP address that allows you to access and build your site before changing the DNS.
2. Create a Fresh Database
Every WordPress installation requires its own database. You must create one on your new host:
- Log into your new host’s control panel.
- Navigate to MySQL Databases.
- Create a New Database and a New Database User, then assign the user to the database with All Privileges.
- Record the Database Name, Username, and Password—you will need these shortly.
3. Import the Database and Files
Option A: Using the Migration Plugin (The Easy Way)
- Install a clean, fresh version of WordPress on your new host.
- Install the same migration plugin you used for the backup.
- Use the plugin’s “Import” feature and upload the large backup file you downloaded in Phase
1. The plugin handles the file transfer, database import, and URL updating automatically.
Option B: Manual Import
- Import Files: Upload all the files you downloaded in Phase 1 to the new host’s public_html directory via FTP.
- Import Database: Log into the new host’s phpMyAdmin, select your newly created database, click the “Import” tab, and upload the .sql file you exported.
- Update wp-config.php: Crucially, you must edit the wp-config.php file on the new server to reflect the new database credentials (name, user, password) you created in step 2 of this phase.
Phase 3: Final Checks and Going Live
This phase is where you confirm everything is working correctly before the site goes public on the new server.
1. Verify the Site on the Temporary URL
Use the temporary URL provided by your host to browse the site. Check every crucial component:
- Login: Can you log into the WordPress dashboard?
- Links: Do all internal links (navigation, menus) work correctly?
- Images: Do all images load properly?
- Forms: Do contact or lead forms function?
2. Update DNS Records (The Go-Live Moment)
The final step in the Transfer WordPress to New Host process is pointing your domain name to the new server.
- Get the new host’s Name Server (NS) records or A record IP address.
- Log into your domain registrar (e.g., GoDaddy, Namecheap).
- Update the old Name Server records with the new ones.
- Propagation: This change can take 4 to 48 hours to fully propagate across the globe. During this period, users may see either the old or new version of the site.
3. Post-Migration Cleanup
After propagation is complete, perform these final user-friendly checks:
Install SSL: Ensure your new host has the SSL certificate properly installed and active (https://).
Permalinks: Navigate to Settings > Permalinks and simply click “Save Changes.” This flushes the permalink structure and resolves any 404 errors.
Caching: Clear all caching plugins (both on the site and any server-side caching).
Old Host: Once you are 100% sure the new site is stable and live, you can cancel your old hosting account. Do not do this prematurely!
By following these procedures, you have successfully completed a spam-free, professional WordPress Host Transfer.
If the idea of manual file and database transfers seems too complex or risky, professionals can handle the entire WordPress Migration process for you, guaranteeing zero data loss and minimal downtime.
Final Thoughts on WordPress Host Transfer
Successfully executing the Transfer WordPress to New Host is a critical step for improving your site’s performance and security. By carefully following the three phases—Backup, Setup, and Verification—you ensure a spam-free and flawless WordPress Migration. This disciplined approach protects your data, minimizes downtime, and secures your high ranking status. This move is a strategic investment in your site’s future.
Need expert assistance to ensure a flawless and zero-downtime migration? Don’t risk data loss; let our certified technicians handle your complete WordPress Migration Services today.
2 Comments
What are the most common mistakes people make during a WordPress migration? Are there any steps that should never be skipped for safety?
Is it possible to migrate a WordPress site without any downtime? Which tools would you recommend for beginners?